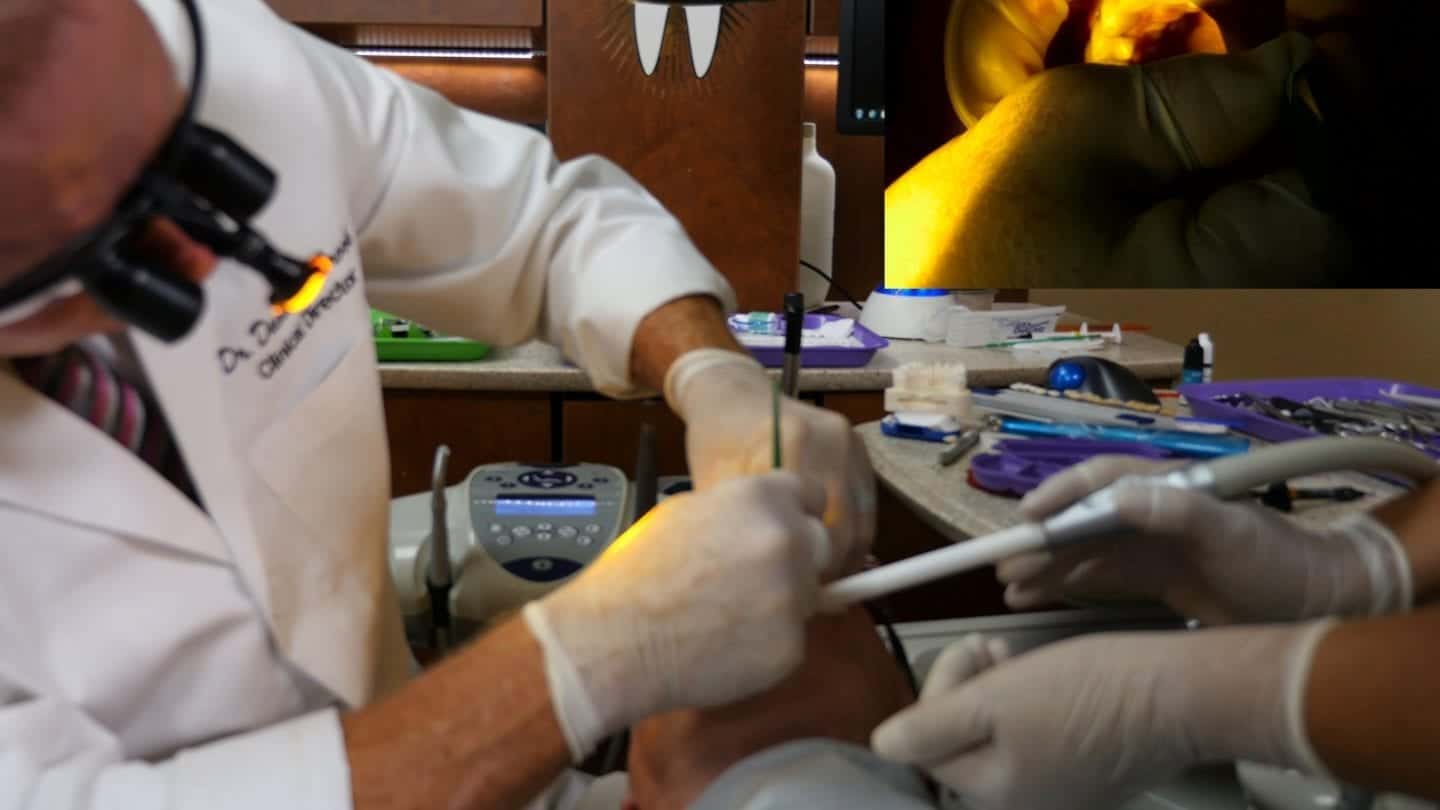
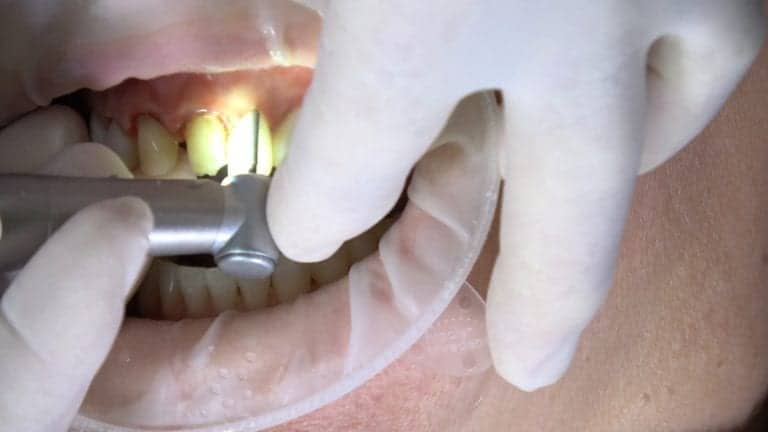
Follow Dr. Hornbrook over-the-shoulder and chairside as he finishes up the number 4 of 4 video tutorial in the “REPLACMENT OF PFM ANTERIOR CROWNS WITH AESTHETIC ZIRCONIA RESTORATIONS” Web Series .
Dr. Hornbrook starts with the Cutting off of the Old PFM material, moving to stump shade taking and finally preparing and seating the aesthetic monolithic zirconia restorations in this dental video tutorial. The patient had a Dark preps due to treatment and PFMs that have been on there for 50 plus years, so we chose, for a number of reasons, he’s got an end to end bite, he’s broken teeth in the past and so we decided to go with the full contour monolithic zirconia dental material.
Included in this remarkable clinical video series is “how to take a stump shade”, esthetic crown material options and how to use them and finally wrapping up with the Replacement of the old anterior crowns with solid zirconia high esthetic restorations.
Be Sure to watch the full video tutorial series in 4K Ultra HD.
Part 1 Removal of Anterior PFM Crowns:
https://keatingdentallab.com/videos/part-1-removal-of-anterior-pfm-crowns-chair-side-procedure
Part 2. How to take a Stump Shade on Anterior Crown Restoration:
https://keatingdentallab.com/videos/part-2-how-to-take-a-stump-shade-on-anterior-crown-restoration
Part 3. Bruxer Aesthetic Anterior Crown Material Solutions (Whiteboard Lecture):
Part 4. Replacement of PFM Anterior Crowns with Aesthetic Zirconia:
Video Tutorial Transcript:
Hello, I’m Dr. David Hornbrook, Clinical Director of Education here at Keating Dental Lab and today we’re going to insert four of our new KDZ aesthetic monolithic zirconia restorations. Dale here has a lot of stuff going on. Dark preps due to [inaudible 00:18:41] treatment and PFMs that have been on there for 50 plus years, would you say, Dale? 57 years. So we chose, for a number of reasons, he’s got an end to end bite, he’s broken teeth in the past and so we decided to go with the monolithic zirconia, the new aesthetic material. It’s very translucent, in fact it rivals most of the old ceramic materials, such as the lithium disilicates and leucite-reinforced ceramic. So we’re going to go ahead and bond these into place. So we’re going to use the total etch technique. Let me know if this is sensitive at all. So this is 35% phosphoric acid. Relatively short prep, that’s why I like to go with a total etch system. So we let this sit for 10 to 15 seconds, making sure that it’s on all the prep both dentin and the enamel, I utilize a total etch technique.
Okay, let’s rinse. It may have a bitter taste. You okay? [00:20:00]
Speaker 2: Mm-hmm (affirmative)
Dr. Hornbrook: Good. Let me get the high speed suction. With the total etch technique, we don’t want to bond to wet or dry dentin. So, what I like to do is rinse, but don’t completely dry and then I take my high speed vacuum and I just remove the excess moisture. Okay, let’s go ahead and mix the primer. We’re going to be using All-Bond 3, which is a fourth generation dentin adhesive. So I like to prep slightly moist. This All-Bond 3 is dual-cured material so it actually has a photo initiator as well as it’ll set up. So the primer is two parts, A and B. So we’ll go ahead and mix it up. Multiple coats, make sure we get enough resin that’ll infiltrate the hybrid zone, create a true hybrid zone. Covering both dentin and enamel. Okay, now we’re going to dry thoroughly with moisture-free air. This is a A-dec, warm-air tooth dryer, and what it does it’s a venturi system, when I put my foot on the rheostat, air comes through, runs through this venturi system, eliminates any moisture and actually creates warm air. So we’re going to apply this first, we need to completely evaporate the alcohol, because this is an alcohol system. We first do it with this and we shouldn’t see the resin move around at all anymore. Then we can take [00:22:00] our water syringe and aggressively evaporate off [inaudible 00:22:08] to carry that alcohol.
Then we’re going to go ahead and light cure that. Thank you, JoAnn. You okay, Dale?
Speaker 2: Yeah.
Dr. Hornbrook: We’ll do about 10 to 15 seconds per tooth. This is the valo cordless light from Ultradent. Very very nice light. Multiple wavelength LEDs, so it’ll cure everything in your practice, which is nice. A lot of the LEDs will not. Okay. We’re going to go ahead and be using a light-cure only resin cement, this is Variolink Esthetic. In a PFM, a porcelain-fused-to-metal crown or the traditional monolithic zirconia, we would use a dual-cure. But because this material, this aesthetic material is so translucent, we can use a light-cure only. So, go ahead and load the crown, put it into place. How’re you doing Dale?
Speaker 2: I’m doing fine.
Dr. Hornbrook: That’s good. Good good good. Don’t turn it on until I tell you to. Don’t take it out of their mouth until it’s turned off. On and off outside their mouth. Okay. Perfectly fit, unbelievably. Okay. Let’s go ahead, I’m going just hold the tip, you’re going to hold the light. [00:24:00] I’ll tell you when to turn it on. And what I do is I cure dead center for one second. Go ahead. One-thousand one. Okay. Turn it off. When I say okay, I’m going to have you turn it on. Okay. One-thousand one, okay. Good. Okay. One-thousand one, okay. Okay. One-thousand one, okay. Now we’re going to do it with the lingual as well since it’s a full coverage crown. If these were veneers, it would just be on the facial. One-thousand one. One-thousand one. One-thousand one. One-thousand one. Okay. Now, we’re going to be using the tack and wave technique, so that is our tack. Now we have our regular light, if you only had one light, you would just switch and take the 2 millimeter tip off that light and put the regular. Now we’re going to cure back and forth for about five seconds. One-thousand one, one-thousand two, one-thousand three, one-thousand four, one-thousand five. One-thousand one, one-thousand two, one-thousand three, one-thousand four, one-thousand five. Okay, let me have another 12 Bard-Parker blade.
All right, now we’re going to go ahead and use a number 12 Bard-Parker blade, since we waved it with a 12, which is a curved blade. And we gently, and I apologize if I pinch you, we gently peel away the excess. Sorry. You okay?
Speaker 2: Yeah.
Dr. Hornbrook: Go ahead and suction. [00:26:00] Okay.
Speaker 2: [inaudible 00:26:14]
Dr. Hornbrook: Okay, so we’re cutting a lot of that. I’ll just be working here a little bit. Okay, so, if you’ve done this right, this excess just peels away. If you over-cure, it’s just harder to peel away. If you under-cure, it’ll be a little gooey. And then you just zap it with your light for another couple seconds. Last area. You okay?
Speaker 2: Mm-hmm (affirmative)
Dr. Hornbrook: Okay. Suction. Okay, let me have a piece of floss. Chin down a little bit. Give me some floss. They look nice. Okay, now we’re going to go ahead and floss through. Next will be DeOx. You okay?
Speaker 2: Mm-hmm (affirmative)
Dr. Hornbrook: All right, so you’ll be able to floss your teeth again, Dale.
Speaker 2: Yeah.
Dr. Hornbrook: You know, this hasn’t been fully cured yet, which is tack and wave. DeOx is clear. Okay, now we’re going to go ahead and use a glycerin or an oxygen inhibition medium and this happens to be DeOx from Ultradent, [00:28:00] we put it around all the margins. And then we’re going to go ahead and cure. Why don’t you grab that other light, we’ll cure with both lights. And this is light-cure only, so I’m going to cure for at least 40 seconds per tooth, both facially and lingually. Put the other tip on. Other tip. That’s only for the tack. Okay. Let’s go ahead and grab two lights and we’ll stick it right on the crown. Right on the crown. Perpendicular, right like that. Mostly gingival [inaudible 00:28:34]. This new KDZ aesthetic, one of the zirconia materials is really translucent so we’ll be able to cure right through it. Okay, 90 degree angle. This is off. Okay, perfect. Let’s go ahead and rinse. You okay?
Speaker 2: Mm-hmm (affirmative)
Dr. Hornbrook: We’re having fun.
Speaker 2: Mm-hmm (affirmative)
Dr. Hornbrook: Turn toward me a little bit, Dale. Chin down a little bit. Okay. I’m just going to take this Bard-Parker again, go around the margins, you spit so well that there’s really no excess to remove, [00:30:00] which is nice. If there’s any little ledge or there may be a little bit of cement you can’t take of with Bard-Parker, we’re going to take a 25 micron finishing diamond and use the diamond with water, very gently. I call it painting the margin. I almost use the diamond like [inaudible 00:30:52] again, so lightly because this thing fits so well. Okay, some water please. There it is right here. Just going to check the margins, good. Use the saliva ejector please. Okay. Wow these look great. You have a new smile, my friend. I don’t think you’re wife’s going to be too happy with all the girls chasing you. Piece of floss please. Chin down. I got one right here. [00:32:00] Dale, I’m going to ask you to bite down, how’s it feel. Just tell me it feels good, okay? Let me check the bite, I want to make sure it’s not high.[inaudible 00:32:24] Go ahead and open for me, there’s a little piece of cement right on his tongue. Go ahead stick your tongue out. Good. Okay, bite down. How’s that feel?
Speaker 2: Oh, it feels very good.
Dr. Hornbrook: Perfect. Chin down a little bit. Bite down again. Monolithic zirconia. That looks great. It’s a concept we never had before. This is a KDZ aesthetic. Monolithic zirconia. Okay. Wraps it up. So you saw how we were able to use a material that is unbelievably strong. Really the strongest ceramic we have in dentistry. Yet, it rivals that of most of our alternative traditional materials. With his end to end bite and his history of wear and breaking [inaudible 00:33:23] of the enamel, this is an ideal material for us. We don’t compromise aesthetics and we maximize strength. Hopefully you’ll have an opportunity to use new aesthetic material sometime in the near future in a case in your own practice.

